In this blog, I will explain how to self host a lightweight password manager application, we are using Vaultwarden (previously known as Bitwarden_rs).
What is Bitwarden?
Bitwarden is an open source password management application that can be self-hosted and run on your infrastructure. The bitwarden_rs project provides a lightweight, single-process, API-compatible service ideal for running personal instances. By running the bitwarden_rs service, you can use Bitwarden browser extensions and mobile applications backed by your server.
In this Guide
This guide uses the official vaultwarden Docker image. A reverse proxy ( Nginx Proxy Manager) is configured in front of the Docker container. This provides TLS termination for both the web-based vault interface and the websocket server.
This configuration of vaultwarden also uses the default SQL backend for the application (sqlite3). The SQL datastore for vaultwarden contains the user data of the application and is therefore the primary concern for a backup scheme. Backing up this datastore ensures that sensitive data stored within vaultwarden is saved in the event of a data loss scenario.
Before starting, What you need to build this set-up
- A linux machine installed with Docker and Docker-compose
you can replicate this setup to any environments, whether it is VPS or Raspberry-pi or Home lab server
2. NGIX Proxy, you can follow below guide to set-up easy nginx proxy manager

once you have the server ready.. lets begin.
STEP 1: Install Vaultwarden
This section outlines how to download the vaultwarden Docker image, setup volume persistence, and manage the Docker container.
 sudo mkdir vaultwarden
 cd vaultwarden
Create the Docker container for vaultwarden.
docker pull vaultwarden/server:latest
docker run -d --name vaultwarden -v /vw-data/:/data/ -p 8443:80 vaultwarden/server:latest
This command uses the following flags to establish a persistent container to serve the bitwarden_rs application:
-ddaemonizes the container to run in the background.- Using
--name vaultwardengives the container a human-readable name to avoid the need to reference the running container by a temporary identifier. - By passing the host path
/vaultwardento the volume (-v) flag, data is persisted outside of the container whenever it is stopped. - The environment variable
WEBSOCKET_ENABLEDenables the extra websocket server forvaultwarden. - Each
-pflag forwards the respective host ports to the container (port 8080 for the mainvaultwardenweb service and port 3012 for websocket traffic). Normal HTTP and HTTPS ports are served with Caddy. --restart=on-failureensures that the container remains up in the event of container failure or host restart.As part of these steps, note that the container listens for traffic on the local loopback interface (127.0.0.1) and not a publicly reachable IP address. This is to ensure that any traffic originating from outside the host must connect to the Caddy server, which enforces encrypted TLS connections.
Docker Compose Method
if you are prefer docker-compose method over the direct docker pull, please follow below instructions.
Create docker-compose.yml file inside your root folder
cd vaultwarden
nano docker-compose.yml
copy paste below code to docker-compose.yml
version: "3"
services:
  vaultwarden:
    image: vaultwarden/server:latest
    container_name: vaultwarden
    restart: unless-stopped
    ports:
     - 8443:80 #map any custom port to use (replace 8443 not 80)
    volumes:
     - ./bitwarden:/data:rw
    environment:
     - ADMIN_TOKEN=${ADMIN_TOKEN}
     - WEBSOCKET_ENABLED=true
     - SIGNUPS_ALLOWED=false
     - SMTP_HOST=${SMTP_HOST}
     - SMTP_FROM=${SMTP_FROM}
     - SMTP_PORT=${SMTP_PORT}
     - SMTP_SSL=${SMTP_SSL}
     - SMTP_USERNAME=${SMTP_USERNAME}
     - SMTP_PASSWORD=${SMTP_PASSWORD}
     - DOMAIN=${DOMAIN}

networks:
  default:
    external:
      name: nginx-network
networks i have mentioned (nginx-network) in above docker-compose is external, you may need to create your own network when you deploy the nginx-proxy-manager.
Note: As you may heard of news from Docker Hub team regarding the Opensource team restructure, you can switch the docker-image source to GitHub or Quay as below.
#To Change Docker image source to GitHub replace with below command
image: ghcr.io/dani-garcia/vaultwarden

#To Change Docker image source to Quay.io replace with below command
image:quay.io/vaultwarden/server
Create environment files in the same root folder.
cd vaultwarden
nano .env
copy paste below code and replace the values based on your set-up
ADMIN_TOKEN= # randomly generated string of characters, for example running openssl rand -base64 48
WEBSOCKET_ENABLED=true
SIGNUPS_ALLOWED=false
SMTP_HOST=smtp.eu.mailgun.org
[email protected] ##replace example.com with your domain
SMTP_PORT=587
SMTP_SSL=true
[email protected]
SMTP_PASSWORD=mailgun password
DOMAIN=https://bitwarden.example.com #replace example.com with your domain
if you prefer to download these files, you can check here my gihub repo
Step 2: Add vaultwarden to nginx-proxy-manager
login to your nginx-proxy-manager (NPM)
- Click on Add Proxy Host
2. Add your vaultwarden host with the port number
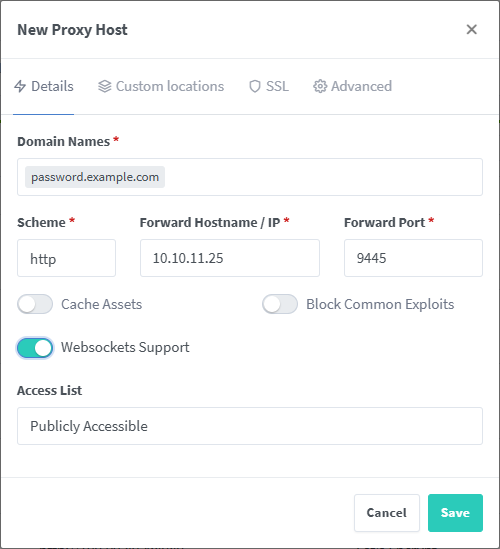
make sure you replace password.example.com with your actual domain
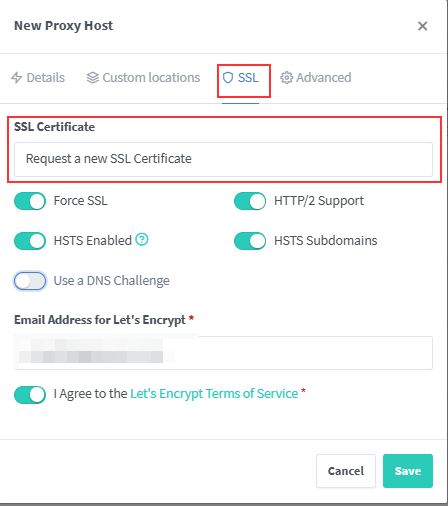
3. Obtain SSL certificate from SSL tab
You need a valid SSL certificate in order to run this application.
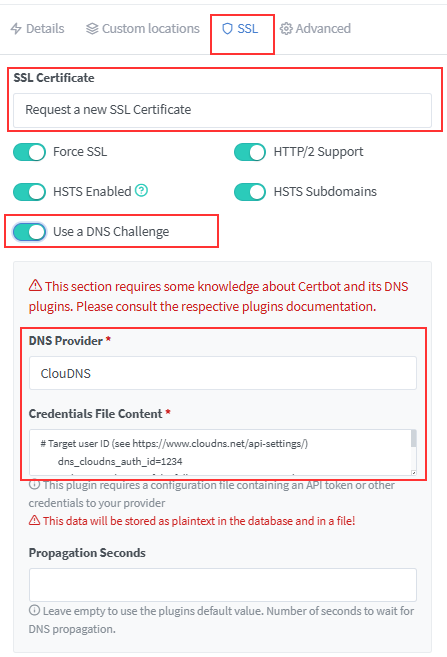
Once you are done, you can navigate to password.example.comif you prefer DNS-Challenge, get the API token from the DNS provider and get the certificate
STEP 3: Initial Setup
Navigate to the chosen domain in a local web browser (in this tutorial, password.example.com). Verify that the browser renders the Bitwarden web vault login page, and that the page is served over TLS/SSL.
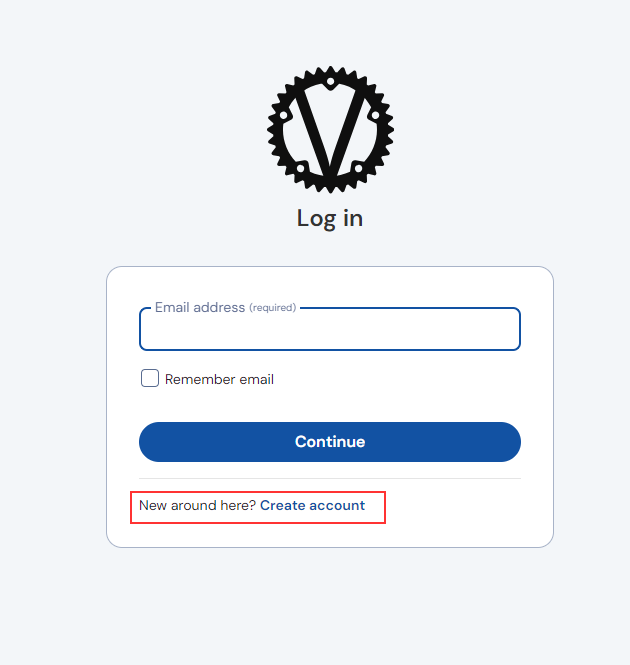
If you see the login page, congratulations! vaultwarden is running and operational. The first step in using the password manager is to create an account. Do so by clicking on the Create Account button on the login page.
NoteRemember to navigate to the same name configured in your nginx-proxy-manager defined in the previous section of this guide. A mismatched hostname in your browser can cause TLS errors.A new page appears with several fields.
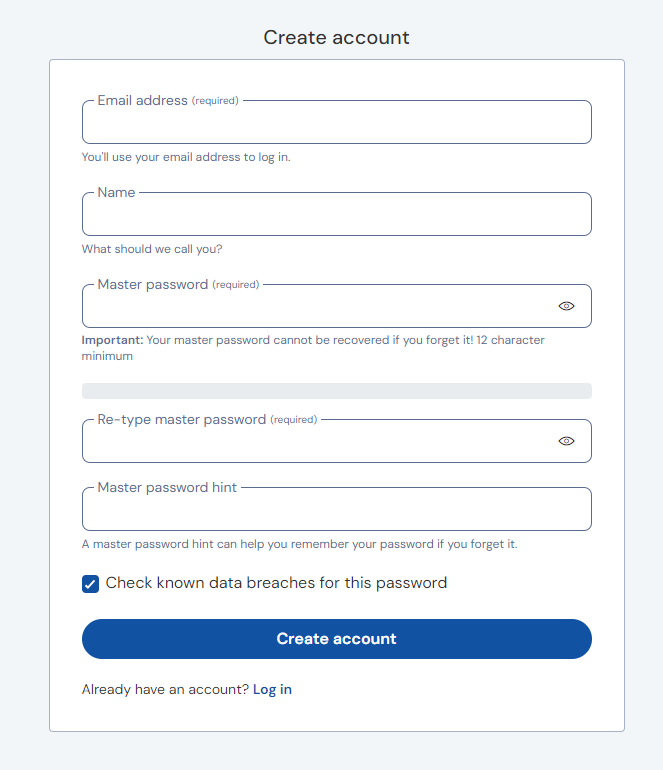
Fill each field with the appropriate information, choosing a strong and secure master password.
Note: Although a user email is required at time of registration, by default, the deployment of vaultwarden cannot send email without additional configuration. If you would like to configure SMTP in order to enable bitwarden_rs to send email, follow these instructions on the vaultwarden documentation. Use SMTP information from an SMTP provider when following the instructions.
After registering, the system redirects you to the login screen. Log in with the credentials. The web vault view appears.
At this point, the vaultwarden installation is functional.
STEP 4: Using vautwarden
vaultwarden provides a compatible API for many Bitwarden apps and browser extensions. In order to configure these applications to use a hosted instance, you may need to configure the mobile application or browser extension. Specifically, you may need to enter a custom domain and API endpoint:
As an example, this is the initial login screen for the Firefox Bitwarden browser extension. In order to configure a custom server, click the gear in the upper left corner.
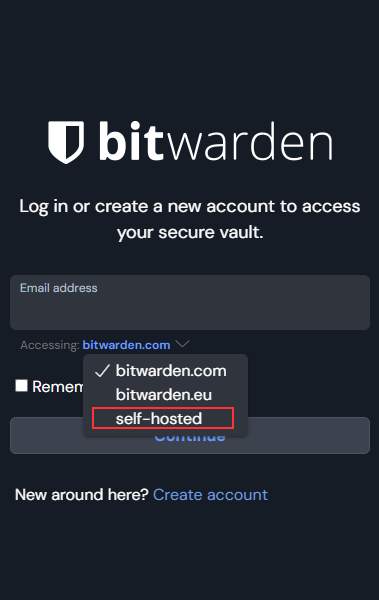
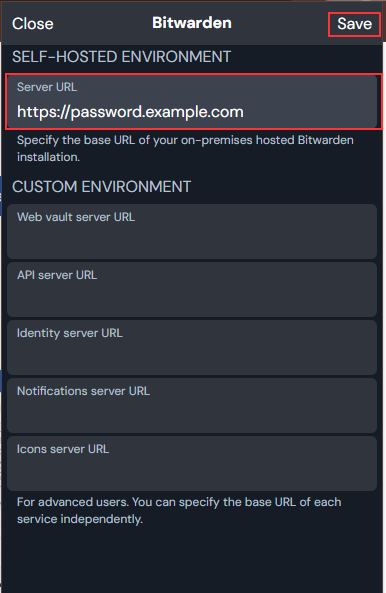
- On the next page, type your custom domain under the Server URL field, such as
https://bitwarden.example.com. Similar steps can be taken on the iOS and Android mobile applications. Edit the settings of the application before login to use a custom Server URL, and you can log in to a custom instance of vaultwarden.
now you have your own self hosted password manager